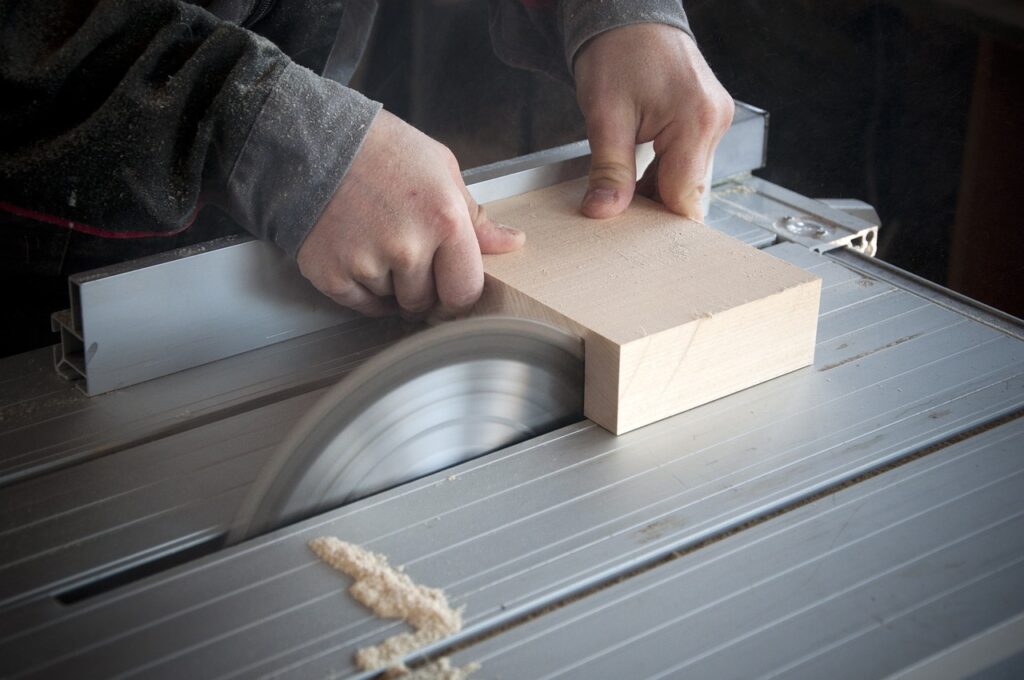
If you’ve ever wondered how to tackle long boards on a table saw, look no further. This article will guide you through the process step by step, ensuring that you can confidently and safely rip those lengthy pieces of wood with ease. From setting up your table saw to making precise measurements, you’ll learn the tricks of the trade that will have you ripping long boards like a pro in no time. So grab your safety goggles, fire up that table saw, and get ready to take on your next woodworking project with confidence.

Safety Precautions
Wear safety gear
When working with a table saw, safety should always be the top priority. Before you even begin using the table saw, make sure you are wearing the appropriate safety gear. This includes safety glasses or goggles to protect your eyes from any flying debris, ear protection to guard against the loud noise of the saw, and a dust mask to prevent inhaling any sawdust.
Clear the workspace
Before you start ripping long boards on the table saw, it is crucial to clear the workspace of any unnecessary clutter or obstructions. Remove any tools, materials, or debris that may interfere with your work or pose a safety risk. A clean and organized workspace will allow you to focus on the task at hand and ensure that you have enough room to maneuver the long boards safely.
Inspect the table saw
Before using the table saw, give it a thorough inspection to ensure that everything is in proper working order. Check for any loose or damaged parts and make any necessary repairs or adjustments before proceeding. It is important to have a well-maintained table saw to ensure not only safety but also accurate and efficient cuts.
Use the appropriate blade
Choosing the right blade for ripping long boards is essential to achieve clean and precise cuts. A rip blade with 24 to 30 teeth is recommended for ripping through the grains of the wood. Make sure the blade is sharp and clean before starting the ripping process. Dull or dirty blades can lead to rough cuts and increase the risk of accidents. Remember to always use the appropriate blade guard and splitter to further enhance safety.
Secure the boards
Before making any cuts, it is crucial to securely fasten the boards to the table saw. This can be done by using clamps or a table saw sled to ensure that the boards do not move or shift during the ripping process. Securing the boards properly will not only help maintain accuracy in your cuts but also reduce the risk of kickback and other potential accidents.
Preparing the Table Saw
Set the fence
The fence is an essential component of the table saw that helps guide the boards during the cutting process. Before ripping long boards, make sure the fence is properly aligned with the blade and set at the desired width of the cut. Ensure that the fence is locked securely in place to avoid any movement during the cut, as this can lead to inaccuracies and potential hazards.
Adjust the blade height
Properly adjusting the blade height is crucial for achieving clean and efficient cuts when ripping long boards. Set the blade height so that it is slightly higher than the thickness of the wood you are working with. This will help prevent the wood from binding against the blade and reduce the risk of kickback. Remember to always adjust the blade height when the table saw is turned off and unplugged for safety.
Check the miter gauge
The miter gauge is another important accessory that assists in making precise angled cuts. While it may not be necessary for ripping long boards, it is still important to check the miter gauge to ensure it is set at 90 degrees, perpendicular to the blade. This will help maintain accuracy and prevent any unintended angular cuts.

Measuring and Marking
Measure the desired width
Before making any cuts, it is essential to measure and determine the desired width of the boards you plan to rip. Use a measuring tape or a ruler to accurately measure the width and mark it on the surface of the wood. Taking the time to measure carefully will help ensure that your final pieces are the correct size and fit your project perfectly.
Mark the cut line
Once you have determined the width of the boards, it is important to mark the cut line accurately. Use a pencil or a marking knife to draw a straight line along the width of the board, indicating where you will be making the rip cut. This will serve as a visual guide and help you maintain accuracy throughout the cutting process.
Making the Rip Cut
Position the board
Place the board on the table saw’s surface with the marked cut line aligned with the fence. Ensure that the board is properly aligned and rests flat against the saw’s surface to prevent any tilting or wobbling during the cut. Taking the time to position the board correctly before starting the saw will help achieve straight and accurate cuts.
Turn on the table saw
Before turning on the table saw, ensure that the blade is clear of any obstructions and that all safety measures, such as blade guards and splitters, are in place. Once you have confirmed this, switch on the table saw and allow it to reach its full speed before making the cut. Always keep your hands away from the spinning blade.
Guide the board through the cut
As the table saw blade is rotating, carefully guide the board through the cut. Maintain steady downward pressure against the table saw’s surface and evenly feed the board through the blade. Avoid forcing the board or pushing it too fast, as this can lead to kickback or rough cuts. Remember to keep a firm grip on the board and use a push stick or push block if necessary.
Maintain a steady pace
When ripping long boards, it is important to maintain a steady pace throughout the cut. This will help ensure consistent and straight cuts. Avoid rushing or hesitating during the process, as this can result in uneven cuts or accidents. Practice patience and maintain a consistent rhythm as you guide the board through the cut.
Keep hands clear
Throughout the rip cut, always keep your hands clear of the blade and its immediate vicinity. This is where accidents are most likely to happen, especially if your fingers come into contact with the spinning blade. Use a push stick or push block to keep your hands at a safe distance from the blade while still maintaining control over the board. Your safety is of utmost importance, so never compromise it.

Ripping Multiple Boards
Use a featherboard
When ripping multiple boards simultaneously, it can be challenging to maintain consistent pressure and prevent them from shifting during the cut. To overcome this challenge, consider using a featherboard. A featherboard is a handy tool that applies pressure against the boards, keeping them snugly against the fence and table saw surface. This will help ensure accurate and straight cuts across all the boards.
Create a push stick or push block
When ripping multiple boards, it is advisable to use a push stick or push block to assist in guiding the boards through the cut. These tools not only keep your hands a safe distance from the blade but also provide better control and pressure distribution. Creating a custom push stick or push block suited to your needs and the length of the boards will greatly enhance safety and precision.
Ripping Narrow Boards
Use a sled or jig
When ripping narrow boards that may not have enough surface area to rest against the fence, it is recommended to use a sled or jig. A sled or jig allows you to safely and precisely guide the narrow boards through the cut. By providing additional support and stability, a sled or jig helps prevent the narrow boards from tilting or wobbling during the cut, resulting in straight and accurate cuts.
Secure the narrow board
To ensure the narrow board is securely positioned during the cut, use clamps or other means to hold the board firmly against the sled or jig. This will prevent any movement or shifting of the narrow board and help maintain accuracy and safety throughout the ripping process. Taking the time to properly secure the narrow board will eliminate any potential hazards and ensure the best possible outcome.
Ripping Curved Boards
Make relief cuts
Ripping curved boards can be a bit more challenging, but with the right technique, it can be accomplished successfully. One useful approach is to make relief cuts along the curve before attempting the full rip cut. Relief cuts are partial cuts made at regular intervals along the curve, which helps relieve the stress and strain on the wood, making the rip cut easier and smoother.
Carefully guide the board
When ripping curved boards, it is crucial to guide the boards through the cut with extra caution. The curve may cause the board to deviate or twist during the cut, so steady and deliberate guiding is necessary. Take your time and be patient as you navigate the curve, ensuring that the board remains securely against the fence and table saw surface. Maintain a firm grip and use a push stick or push block for added safety.
Ripping Thick Boards
Multiple passes
When ripping thick boards, it is often necessary to make multiple passes to achieve the desired width. Trying to cut through the entire thickness in a single pass can be dangerous and may strain the blade or motor. Begin by making a shallow pass, cutting only a portion of the thickness, then readjust the fence and repeat the process until the desired width is achieved. This gradual approach will ensure the best results and maintain safety.
Support the board
To prevent the thick board from sagging or tilting during the multiple passes, it is crucial to provide proper support. Consider using sawhorses or additional supports to keep the board level and stable throughout the cutting process. By supporting the board adequately, you will not only achieve straight and accurate cuts but also prevent potential accidents or injuries.
Take your time
Ripping thick boards requires patience and attention to detail. Take your time during each pass, ensuring that the board is securely positioned, the blade is aligned correctly, and all safety precautions are in place. Rushing through the process can lead to inaccuracies, accidents, and the risk of damaging the board or the table saw. Remember, slow and steady wins the race when it comes to ripping thick boards.
Ripping Warped Boards
Stabilize the board
When working with warped boards, it is essential to stabilize them before attempting any cuts. Warped boards have a tendency to move or twist during the cut, which can be hazardous. To stabilize the board, use clamps or additional support to hold it firmly in place. By minimizing movement and instability, you will have better control over the cutting process and reduce the risk of accidents.
Make shallow cuts
To accommodate the irregularities of warped boards, it is advisable to make shallow cuts instead of trying to remove a significant amount of material in a single pass. By making incremental cuts, you can gradually straighten the board while minimizing the strain on the blade and motor. Take your time and adjust the fence accordingly to achieve the desired width slowly and safely.
Tame the warp
Dealing with warped boards can be a bit challenging, but by using the proper techniques and tools, you can tame the warp and transform them into usable pieces. Each board may require a slightly different approach, so be patient and experiment until you find the best method for each specific case. With practice and experience, you will become more confident in handling warped boards and achieving successful cuts.
Common Mistakes to Avoid
Not using a push stick
One common mistake to avoid when using a table saw is not using a push stick or push block. These tools are designed to keep your hands a safe distance from the blade while still allowing you to maintain control over the board. Neglecting to use a push stick or push block significantly increases the risk of accidents and injuries. Always prioritize your safety and use a push stick or push block when necessary.
Improper board placement
Another mistake to avoid is improper board placement on the table saw. Failing to position the boards correctly can lead to inaccurate cuts or even kickback. Take the time to align the board with the fence and table saw surface, ensuring that it rests flat and snugly against both. Proper board placement will not only enhance accuracy but also prevent dangerous situations.
Using dull blades
Using dull blades is a crucial mistake to avoid when ripping long boards on a table saw. Dull blades produce rough and uneven cuts, which can ruin your project and increase the risk of accidents. Always ensure that your blade is sharp and clean before starting the ripping process. If the blade is dull, replace it with a new one to maintain efficiency and safety.
Forgetting to secure the boards
Forgetting to secure the boards properly is a mistake that can have serious consequences. Unsecured boards can shift or move during the cut, leading to inaccurate cuts or even kickback. Always take the time to secure the boards firmly to the table saw using clamps or a table saw sled. This simple step will greatly reduce the risk of accidents and ensure precise and safe cuts.
In conclusion, ripping long boards on a table saw can be a rewarding and efficient way to achieve the desired widths for your projects. By following the outlined safety precautions, preparing the table saw correctly, measuring and marking accurately, and utilizing the appropriate techniques for different types of boards, you can successfully rip long boards with ease. Remember, safety should always be the top priority, so take your time, be patient, and practice the necessary techniques to ensure both the quality of your cuts and your well-being. Happy ripping!

