So you’ve just purchased a new drill press and are eager to unleash its power and precision on your next project. But before you can start drilling, you need to learn how to properly put the chuck on the drill press. In this article, we will guide you through the step-by-step process of attaching the chuck to your drill press, ensuring a secure and efficient setup for all your drilling needs. From selecting the right chuck to tightening it securely, we’ve got you covered. So let’s get started and get that chuck on the drill press in no time!

Preparing the Drill Press
Gather the necessary tools
Before starting the process of installing a new chuck on your drill press, it’s important to gather all the necessary tools. You will need a wrench or chuck key (specific to the drill press model), a cleaning cloth, lubricant, and any additional accessories required for the chuck installation.
Inspect the drill press
Inspecting the drill press is an essential step to ensure that it is in proper working condition before changing the chuck. Check for any visible damages or signs of wear and tear. Make sure all the parts are functioning correctly, including the table, spindle, and motor. It’s crucial to address any issues before proceeding, as a faulty drill press can pose safety risks during the installation process.
Ensure safety precautions
Safety should always be a top priority when working with power tools like a drill press. Before starting any work, make sure to wear appropriate safety gear, including safety glasses and gloves. Clear the work area of any obstructions or clutter that could interfere with the process. Additionally, ensure that the drill press is stable and securely positioned on a flat surface to prevent any accidents or mishaps.
Removing the Old Chuck
Unplug the drill press
Before attempting to remove the old chuck, it is essential to unplug the drill press from the power source. This step is crucial to prevent any accidental startup of the machine while working on it, which could lead to serious injuries. Double-check that the drill press is completely powered off to ensure your safety.
Lower the drill press table
To gain better access to the chuck, it is advisable to lower the drill press table. Most drill presses have a mechanism for adjusting the table height. Lower the table to its lowest position, allowing for easier removal of the chuck. This will provide you with enough space to maneuver and handle the chuck more comfortably without any obstructions.
Loosen the chuck
Using a wrench or the chuck key specific to your drill press model, loosen the chuck in a counterclockwise direction. This will loosen the grip of the chuck on the arbor, allowing for easier removal. Continue turning until the chuck is completely loosened and can be removed from the drill press spindle. Be cautious while handling the chuck, as it may be heavy or slippery due to grease or dust.
Selecting the Right Chuck
Consider the type of chuck needed
Before proceeding with the chuck installation, it’s important to consider the type of chuck that suits your needs best. There are different chucks available, such as keyless chucks, keyed chucks, and SDS chucks. Each type has its own advantages and disadvantages and is suitable for specific applications. Consider factors such as ease of use, precision, and compatibility with your drill press when selecting the type of chuck.
Check chuck compatibility
Not all chucks are compatible with every drill press. It is crucial to check the chuck specifications and ensure that it is compatible with your specific drill press model. Refer to the drill press’s manual or consult the manufacturer for information regarding the chuck compatibility. Using an incompatible chuck can lead to performance issues and may even cause damage to the drill press or the chuck itself.
Research chuck options
With a wide variety of chuck options available in the market, it’s important to do some research before making a purchase. Look for customer reviews and recommendations to get an idea of the quality and reliability of different chuck brands and models. Consider factors such as durability, ease of installation, and value for money. This research will help you make an informed decision and select a chuck that meets your requirements.

Installing the New Chuck
Prepare the chuck
Before installing the new chuck, make sure it is clean and free from any debris, grease, or dust. Use a cleaning cloth to wipe down the chuck and remove any particles that may affect its performance. Additionally, if the chuck requires any assembly or adjustments, follow the manufacturer’s instructions to prepare it accordingly before installation.
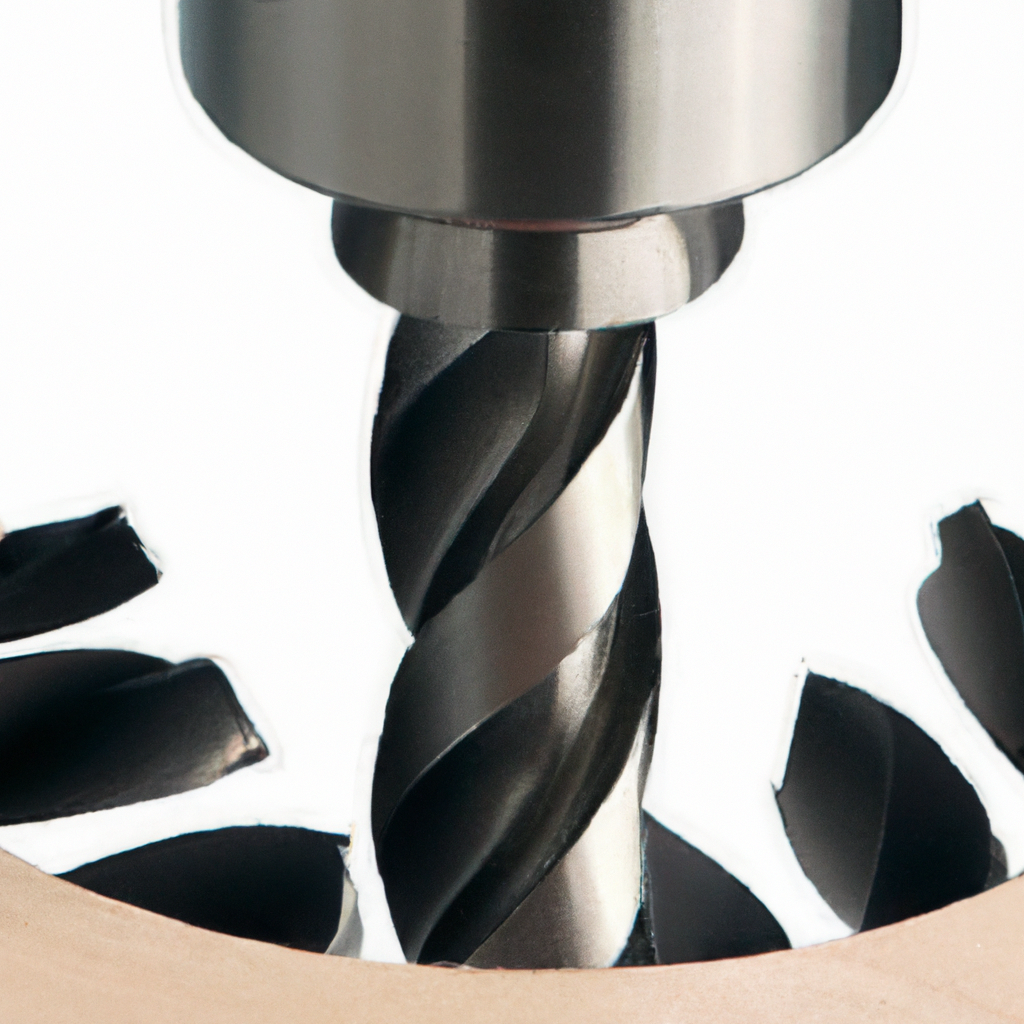
Insert the arbor into the spindle
Take the arbor, which is the cylindrical shaft that connects the chuck to the drill press, and gently insert it into the spindle. Ensure that the arbor is fully inserted and aligned with the spindle to avoid any wobbling or misalignment. Give it a slight twist to make sure it is securely seated and properly positioned.
Align and tighten the chuck
With the arbor properly inserted, align the chuck with the arbor and slide it onto the spindle. Rotate the chuck in a clockwise direction until it is securely tightened onto the arbor. Use a wrench or the chuck key to tighten the chuck further, ensuring a firm grip. Make sure not to overtighten, as it can cause damage to the arbor or the chuck threads.
Testing the Chuck
Securely tighten the chuck
After the installation, make sure to securely tighten the chuck to avoid any accidents or slippage during operation. Use a wrench or the chuck key to give the chuck a final tight turn in the clockwise direction. This tightening ensures that the chuck is firmly locked onto the arbor, providing stability and preventing any unwanted movements.
Test the chuck for stability
To ensure that the chuck is properly installed and stable, conduct a quick stability test. Gently rotate the chuck by hand to check for any rough movements or looseness. A stable chuck should rotate smoothly and evenly without any wobbling or jerking motions. If you notice any irregularities or instability, stop using the drill press immediately and reassess the chuck installation.
Check for any wobbling or misalignment
Once the stability test is complete, visually inspect the chuck for any signs of wobbling or misalignment. Rotate the chuck while observing from different angles to detect any irregular movements. If you notice any wobbling or misalignment, it may indicate an issue with the chuck installation. In such cases, it is advisable to recheck the alignment and tightness of the chuck or seek professional assistance if needed.
Troubleshooting
Chuck not fitting properly
If the new chuck does not fit properly onto the arbor or spindle, it may be due to compatibility issues or incorrect installation. Double-check the chuck specifications and ensure that it is the correct size and type for your drill press. If the chuck still doesn’t fit, check for any obstructions, debris, or damage on the arbor or spindle that could be preventing a proper fit. If the issue persists, it is best to consult a professional technician.
Chuck key stuck
Sometimes, the chuck key may get stuck or difficult to remove after tightening the chuck. This can be due to over-tightening or improper use of the chuck key. If the chuck key is stuck, avoid using excessive force or tools to remove it, as it may cause damage. Instead, switch off the drill press, unplug it, and gently tap the chuck key with a mallet to loosen it. If the chuck key remains stuck, seek professional assistance.
Drill press not functioning correctly
In some cases, after installing a new chuck, the drill press may not function correctly or may have reduced performance. This can be caused by several factors, including incorrect chuck installation, damage to the drill press, or issues unrelated to the chuck. Double-check the installation steps and ensure that the chuck is aligned and tightened correctly. If the drill press still does not function properly, consult the manufacturer or a professional technician to identify and address the issue.
Maintaining the Chuck
Clean the chuck regularly
To maintain the performance and lifespan of the chuck, it is important to clean it regularly. After each use, wipe down the chuck with a clean cloth to remove any debris, dust, or residue that may have accumulated. This prevents buildup and ensures smooth operation. Avoid using harsh chemicals or abrasive materials that may damage the chuck’s surface.
Inspect for wear and tear
Regularly inspect the chuck for any signs of wear and tear, such as rust, chipped surfaces, or loose parts. These can affect the chuck’s performance and compromise precision. If you notice any issues, address them promptly by cleaning, tightening, or replacing damaged parts as necessary. Regular inspections help identify potential problems early on and prevent any further damage.
Lubricate the chuck
Proper lubrication is essential to keep the chuck operating smoothly and prevent excessive wear. Consult the manufacturer’s guidelines to determine the recommended lubricant for your specific chuck model. Apply a small amount of lubricant to the chuck threads and moving parts, following the manufacturer’s instructions. Regular lubrication helps reduce friction and ensures the chuck functions optimally.
Safety Precautions
Wear appropriate safety gear
When working with a drill press, it’s crucial to prioritize safety by wearing appropriate safety gear. Always wear safety glasses to protect your eyes from flying debris or accidental contact with the chuck or drill bit. Additionally, wearing gloves helps protect your hands from cuts, burns, or slippage while handling the chuck or operating the drill press.
Ensure the drill press is stable and secure
Before starting any work on the drill press, make sure that it is securely positioned on a stable surface. A wobbling or unstable drill press can lead to accidents or workpiece damage. Ensure that all clamps, bolts, and screws are properly tightened to prevent any movement or vibrations during operation. This stability ensures precision and minimizes the risk of accidents.
Avoid loose clothing or jewelry
When operating a drill press or handling the chuck, avoid wearing loose clothing or jewelry that can get caught in the moving parts. Loose clothing or dangling accessories pose a significant safety risk, as they can easily get entangled or pulled into the drill press. It is always advisable to wear fitted clothing and remove any jewelry or accessories that may interfere with your work.
Common Mistakes to Avoid
Forgetting to unplug the drill press
One common mistake many individuals make is forgetting to unplug the drill press before working on it. Failing to do so can result in accidental power activation, which can cause serious injuries. Always double-check that the drill press is unplugged and powered off before proceeding with any maintenance or chuck installation.
Using incorrect chuck size
Using an incorrect chuck size can lead to poor performance and potentially cause damage to both the chuck and the drill press. Always refer to the drill press’s manual or consult the manufacturer to determine the appropriate chuck size for your specific model. Using the correct chuck size ensures compatibility, stability, and optimal functionality.
Not properly aligning the chuck
Improper alignment of the chuck can lead to instability, wobbling, or reduced precision during drilling applications. Take the time to properly align the chuck with the arbor and ensure that it is securely tightened onto the spindle. Following the correct alignment and tightening procedures guarantees the chuck’s stability and maximizes the drill press’s performance.
Seeking Professional Help
When to consult a professional
While many chuck installations can be done by individuals with some mechanical proficiency, there may be situations where consulting a professional technician is necessary. If you encounter any difficulties during the installation process, experience performance issues with the drill press, or are unsure about any aspects of the chuck installation, it is advisable to seek professional help. Professional technicians have the expertise and experience to troubleshoot and handle complex situations effectively.
Benefits of professional assistance
Consulting a professional technician offers numerous benefits when it comes to chuck installation on a drill press. They possess in-depth knowledge and experience in working with different drill press models and chucks. They can address any compatibility issues, perform precise installations, and ensure optimal performance. Additionally, professionals can provide valuable advice on maintenance practices and offer tailored solutions based on your specific needs.
Finding a qualified technician
Finding a qualified technician to assist with chuck installation is crucial for a smooth and successful process. Start by contacting the manufacturer of your drill press or the chuck manufacturer for recommendations. They may have authorized service centers or certified technicians who specialize in drill press maintenance. Alternatively, seek referrals from trusted sources or search online for technicians or service centers that are known for their expertise in drill press repair and maintenance.